Linux OSのubuntuデスクトップ環境に「Chromeブラウザ」をインストール方法を解説します。また、アンインストール方法についても解説します。
 管理人
管理人本記事の読者層は以下の方を想定しています。
- ChromeブラウザをLinuxにインストールしたい方
ubuntuの主要ブラウザー選択肢
ubuntu のデスクトップ環境の要といえば、今やWEBブラウザーといえるでしょう。Ubuntuの標準ブラウザとして、インストール時には「Firefox」がインストールされています。デスクトップ環境のブラウザ機能としてはこれで十分ですが、それ以外にも、googleの 「chrome」やMicrosoftの「Edge」もLinux版パッケージが登場しています。今回は、中でも「google chorme」のインストール方法を解説します。
本作業は、基本的VNC (virtual network computing) viewerを通してデスクトップ環境Xfce内でインストールを行いました。
UbuntuへのVNCのインストールから外部クライアントPCとの接続の方法に関しては以下の記事をご参照ください。

UbuntuへのChromeをインストールする方法
google Chromeブラウザをターミナルからダウンロード
以下wgetコマンドを利用して、最新版のgoogle Chromeをインストールします。
$ wget https://dl.google.com/linux/direct/google-chrome-stable_current_amd64.debシステム要件
- 64 ビット版 Ubuntu 18.04 以降、Debian 10 以降、openSUSE 15.2 以降、Fedora Linux 32 以降のいずれか
- Intel Pentium 4 以降のプロセッサ(SSE3 対応)
Ubuntu 18.04ではなんとかchromeをインストールできるバージョンのようです。
今回のインストール環境は
- OS: ubuntu Linux 18.04.6以降(Ubuntu 20.04やUbuntu 22.04でも利用可能)
- ブラウザ:chrome for Linux 108.0.5359.71 (最新バージョン)
debファイルをダウンロードする際には、Ubuntuに標準搭載されているFireFoxで以下のURLにアクセスして、*.debファイルをダウンロードしてインストールする方法もあります。
Chrome for Linuxをwebからダウンロード
https://www.google.com/chrome/?platform=linux
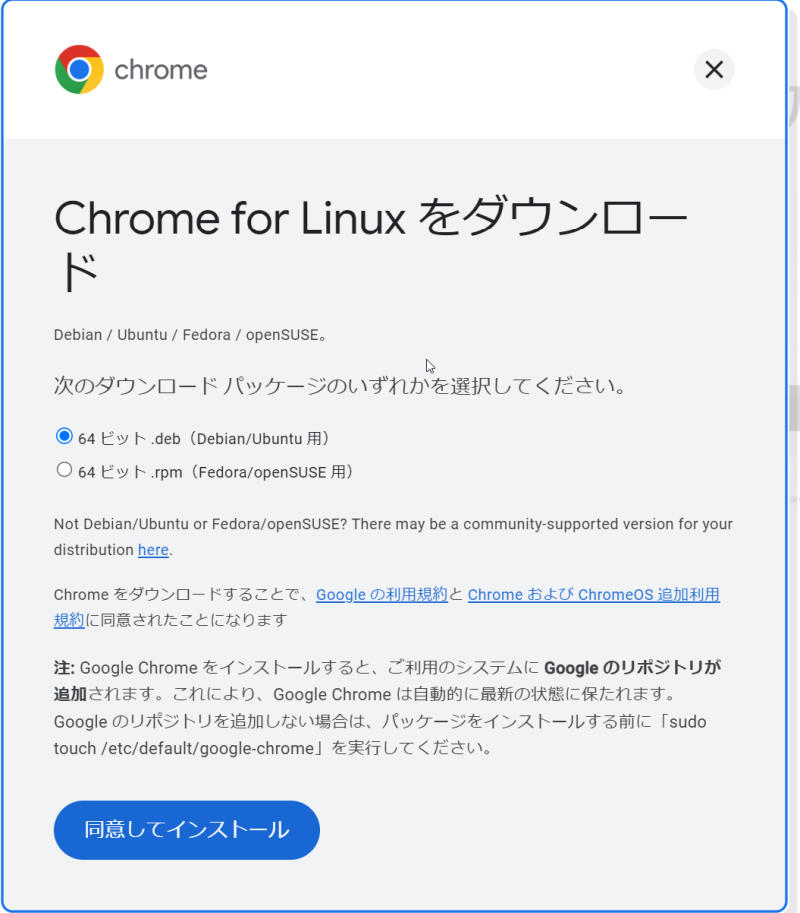
上記の64bit版のdebファイルをダウンロードしてデスクトップに保存しておきます。
インストール
インストールファイルをダウンロードしたら、以下のコマンドを入力します。
sudo apt install ./google-chrome-stable_current_amd64.debこれでインストール作業は終了です。
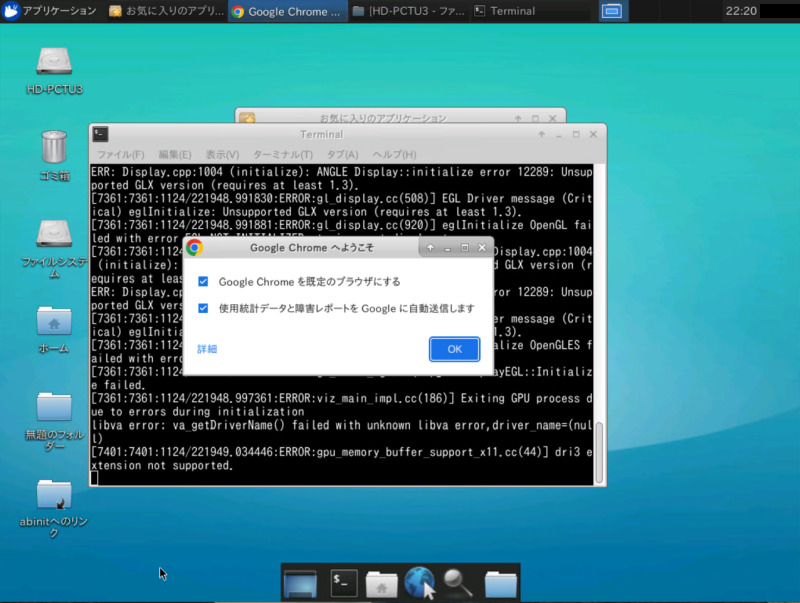
コマンドラインから起動するには以下のコマンドを実行してください。
# Chromeの起動
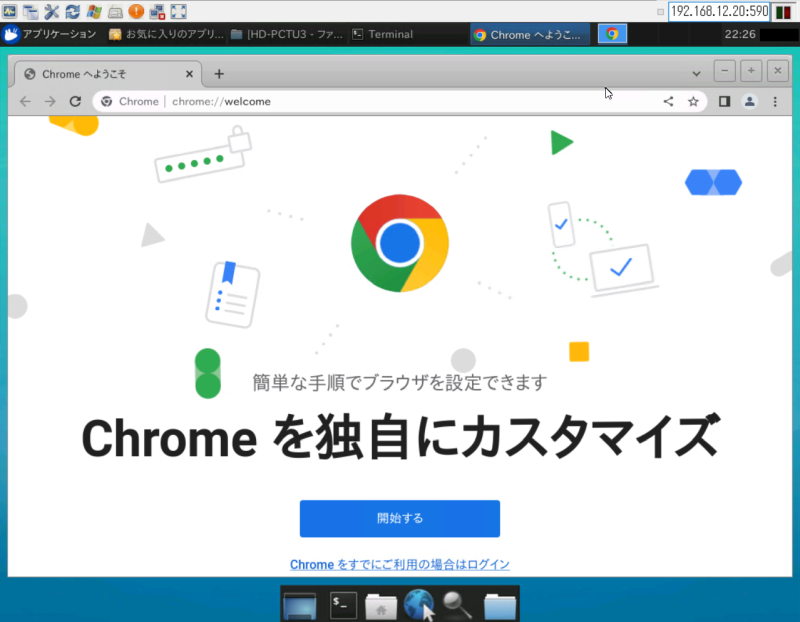
google-chromeすると、以下のようにGoogle chromeが立ち上がります。そのままOKをクリックすればGoogle Chromeが起動します。
ここで、ダウンロードしたgoogle chromeのバージョン情報は以下のように確認できます。
% google-chrome --version
Google Chrome 108.0.5359.71
% sudo apt show google-chrome-stable
Package: google-chrome-stable
Version: 108.0.5359.71-1
Priority: optional
(略)
APT-Manual-Installed: yes「APT-Manual-Installed: yes」となっていれば、手動でインストールされたことになっています。
% sudo apt install google-chrome-stable以上のコマンドでupgradeが可能であればインストールしてくれます。
Snapでのchromeのインストール方法

Ubuntu Chromeのアンインストール方法
Ubuntuデスクトップ上の「Google Chome」をコンソール上からアンインストール方法には以下のコマンドを入力します。
% sudo apt remove google-chrome-stableまとめ
本記事のまとめとして、
- ubuntuデスクトップ環境へgoogle Chromeをインストール方法とアンインストール方法について解説しました。
次回の記事をご期待下さい。どうぞよろしくお願いいたします。
関連リンク


コメント